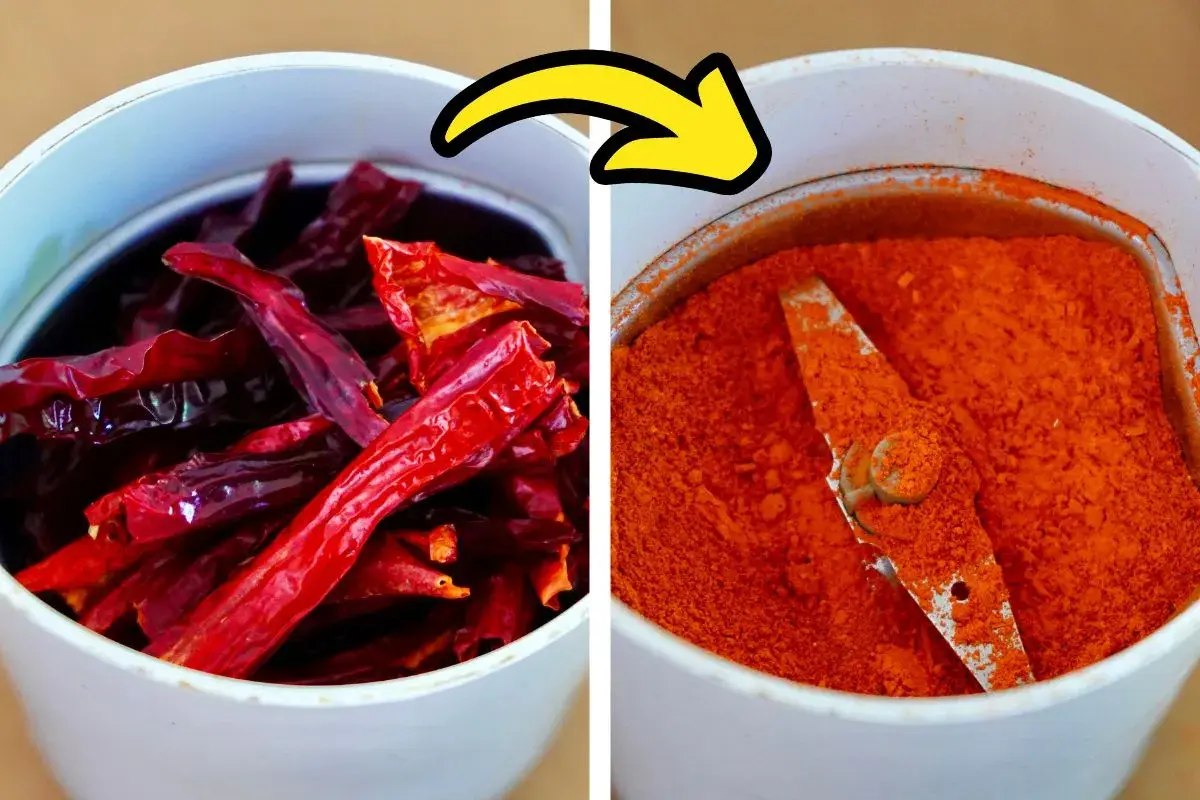
Homemade paprika is simple in concept: ripe peppers are dried, ground, and sealed before their colour and aroma fade. This is the practical version of how to make paprika at home, with the parts that actually change the result, from pepper choice and drying time to grinding and storage. I’m also keeping it grounded in a UK kitchen and in the kind of Basque-leaning cooking where paprika has to do real work, not just sit in a jar.
What matters most before you start
- Use fully ripe red peppers if you want the cleanest colour and the sweetest flavour.
- Slice them thinly and dry them until they are brittle, because soft peppers will not grind cleanly.
- A dehydrator gives the most consistent result, but a low oven works if you watch it closely.
- Grind in small batches, then sift and regrind any coarse bits.
- Store the finished powder in an airtight jar, away from heat, steam, and sunlight.
- Smoked paprika needs an extra smoking step, so it is a different flavour profile rather than a stronger version of the same spice.
Choose peppers that give you the flavour you want
The ingredient list is tiny, which is exactly why the produce matters so much. I look for fully ripe red peppers with thin walls, because they dry faster and give a cleaner flavour than pale, watery fruit. In UK shops that usually means ripe red sweet peppers, pointed peppers, Romano peppers, or homegrown chillies that have turned properly red. Long, slender peppers also tend to dry more evenly than thick blocky ones, which saves you time later.
| Pepper choice | What it gives you | Best use |
|---|---|---|
| Red bell peppers | Mild, sweet, easy to find, but fairly simple in flavour | A first batch or an everyday, gentle paprika |
| Thin-walled red sweet peppers | Brighter colour and a cleaner, more paprika-like taste | An all-purpose homemade paprika |
| Hot red chillies | More heat and a sharper finish | Spicy rubs, bean dishes, and bold stews |
| Smoked red peppers | Deeper, woodier flavour with a savoury edge | Basque-style dishes and Spanish-inspired cooking |
I remove the stems and most of the seeds. Leaving a few seeds will not ruin the batch, but it does make the powder hotter and the colour less polished. If I want a sweeter paprika, I strip the peppers down more aggressively; if I want heat, I keep some of the white membrane. Once the pepper is chosen, drying is where the texture is won or lost.

Dry them completely before you grind them
The goal is to remove moisture, not cook the peppers. I slice them into strips about 1 cm wide so they dry evenly, and I wear gloves if the batch has any serious heat. When they are ready, they should snap cleanly rather than bend. That last detail matters more than most people expect, because a pepper that still feels leathery will grind badly and store badly.
Dehydrator
A dehydrator is the easiest route. I set it to 50-55°C (122-131°F) and expect 8 to 12 hours, depending on thickness and how many trays I have loaded. Rotate trays if your machine runs unevenly. If the peppers still feel flexible at the end, they need more time. Thin-walled peppers usually finish faster, while thicker ones take longer and reward patience.
Oven
An oven works if it can run very low. I use the lowest setting available, ideally around 60°C (140°F), with the peppers on a rack over a tray so air can circulate underneath. If the oven runs hotter than that, I crack the door open and check often, because too much heat can dull the flavour and darken the colour. This is the method I would use only when I had no dehydrator, because it needs more attention.
Read Also: New Potatoes - Cook Them Perfectly Every Time
Air-drying
This is the least predictable method. It can work in a dry, airy spot, but in a damp climate I would only trust it if the room is warm and well ventilated. Expect days or weeks, not hours, and keep an eye out for mould rather than assuming the peppers are simply taking their time. In practice, air-drying is the method with the most romance and the least certainty.
When the strips are brittle, let them cool completely before moving on. That small pause protects the flavour and keeps hidden moisture from sneaking back into the batch.
Grind, sift, and refine the powder
Once the peppers are dry and cool, grinding is straightforward, but the tool you use changes the texture. I prefer a dedicated spice grinder for small batches because it gets closest to a fine powder without much effort. The main thing is to work in small bursts and not overload the grinder, because too much at once gives you flakes instead of a soft, even spice.
| Tool | What it does well | Where it falls short |
|---|---|---|
| Spice grinder | Fast, fine, and ideal for small batches | Needs to be emptied and cleaned between rounds |
| Coffee grinder dedicated to spices | Excellent for a fine powder and easy to find in UK kitchens | Aroma lingers, so it should not double as your coffee grinder |
| Blender or food processor | Handles larger amounts | Often leaves a coarser texture than true paprika |
| Mortar and pestle | Good for a rustic, hands-on finish | Slow and not ideal for more than a tiny batch |
I usually sift the ground pepper through a fine mesh and send the larger bits back into the grinder. That extra minute matters, because paprika that still feels sandy reads more like crushed pepper than spice. I also move the powder straight into the jar while it is cool and dry, before the kitchen air has a chance to pull in moisture. If you want the result to feel properly polished, this is the point where the texture is decided.
Store it like a fresh spice
I treat homemade paprika as a fresh spice, not a decorative one. The best container is a tight-sealing glass jar, and the best location is a cool, dark cupboard away from steam, heat, and direct sun. If I have made a larger batch, I split it into smaller jars so I am not opening the full supply every time I cook.
- Use airtight glass jars. They protect the powder better than open tins or loose lids.
- Keep it cool and dark. A cupboard away from the hob is better than a shelf above the cooker.
- Label the date. I aim to use homemade paprika within about 6 months for the brightest aroma.
- Watch for moisture. If it clumps, the jar has absorbed damp air somewhere along the line.
- Be careful with the fridge. It can help in a humid kitchen, but let the jar come back to room temperature before opening it so condensation does not form inside.
The next decision is not really about storage at all. It is about style, because sweet, hot, and smoked paprika do different jobs in the kitchen.
Sweet, hot, and smoked paprika do different jobs
Sweet, hot, and smoked paprikas are not interchangeable. I treat them as three different ingredients, because the cooking role changes as much as the heat level. That matters even more if you cook in a Basque or Spanish direction, where the smoky version often carries the biggest flavour weight.
| Style | How it is made | Flavour | Best for |
|---|---|---|---|
| Sweet paprika | Dried red peppers ground without smoke | Mild, fruity, and mostly colour with gentle flavour | Eggs, potatoes, light sauces, and everyday cooking |
| Hot paprika | Hotter peppers, sometimes with more membrane or seed left in | Warmth and bite | Bean dishes, rubs, sausages, and stews that need a lift |
| Smoked paprika | Peppers are smoked before they are fully dried and ground | Woodsy, deep, and savoury | Basque dishes, roast vegetables, cod, lentils, and slow-cooked sauces |
If I am cooking Basque-style food, smoked paprika is the version I reach for first. It gives depth to beans, potatoes, cod, and slow-cooked sauces without needing a heavy hand. Sweet paprika is gentler and more versatile, while hot paprika earns its place when a dish needs more bite than smoke. I would not make every batch smoked, because the extra processing narrows its use, but I do like to keep one jar around for dishes that need a deeper, woodier note.
The mistakes that make homemade paprika flat
Most bad paprika is not the result of a difficult recipe. It usually comes from small process errors that are easy to avoid once you know what to look for. I see the same mistakes repeatedly, and none of them are mysterious.
- Using peppers that are not fully ripe. They can taste grassy and look dull rather than bright.
- Rushing the drying stage. If the peppers are still bendy, the powder will not stay crisp in storage.
- Drying too hot. Excess heat can mute flavour and push the colour toward brown rather than red.
- Grinding while the peppers are still warm. Warm powder catches moisture quickly and can clump in the jar.
- Storing near steam or sunlight. A jar beside the cooker fades faster than one in a cool cupboard.
- Expecting bell pepper powder to taste like smoked Spanish paprika. They are related, but the flavour profile is not the same.
If your finished spice is dull brown rather than bright red, the batch usually spent too long in heat or started with peppers that did not have enough natural sweetness. The fix is usually better produce, thinner slicing, and more patience, not more seasoning. When those basics are right, the result is much more vivid than the shop-bought version most people know.
The jar I would make first
If I were starting from scratch, I would make a small sweet paprika batch first, then a smoked batch once I knew I had a method that dried the peppers cleanly. Sweet paprika teaches you the drying and grinding steps without adding another variable, and smoked paprika rewards you once those basics are reliable. In a Basque-style kitchen, that combination covers most of the work: the sweet jar for colour and gentle warmth, the smoked jar for depth.
Make the first batch small, keep the process neat, and you end up with a spice that tastes alive rather than generic. That is the real payoff here, because paprika only looks simple until you compare a fresh home batch with something that has sat on a shelf too long.
