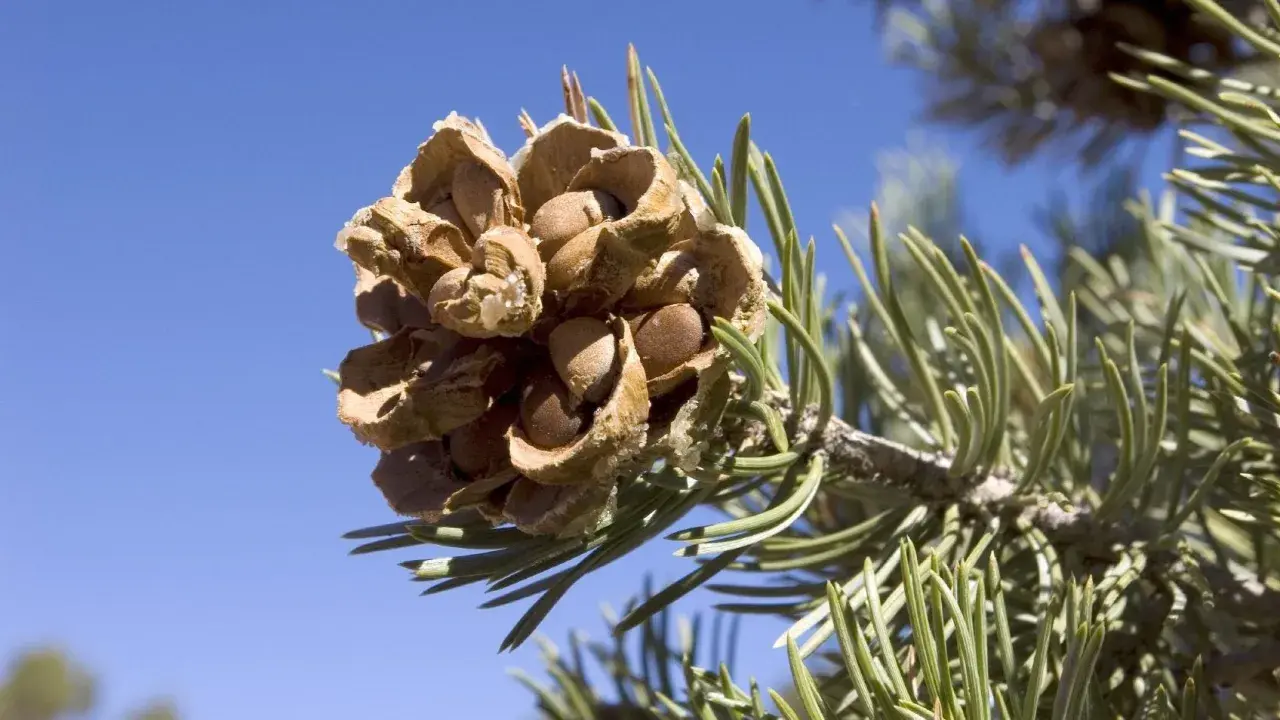
Harvesting pine nuts is less about cracking shells and more about reading the cone at the right moment. The practical answer to how to harvest pine nuts starts with mature, closed cones, a dry place to finish the job, and enough patience to let the seeds release naturally. In this guide I cover which cones are worth collecting, when to pick them, how to dry and open them, and the small mistakes that waste most of the crop.
The quickest route to clean, usable kernels
- Pick cones when they are mature, firm, and still closed, before they turn fully brown and open.
- Use gloves and breathable bags, because pine resin is sticky and trapped moisture ruins the crop.
- Dry the cones in a warm, airy place until the scales loosen and the seeds fall out naturally.
- Expect a modest yield; pine nut collection is labour-heavy even on a good tree.
- Store shelled kernels cold, because their oils go rancid quickly at room temperature.
Start with the right tree and the right cones
I would not assume that every pine cone is worth harvesting. The edible kernels cooks actually want usually come from specific nut-bearing pines, and the harvest only makes sense if the cones are large enough to justify the time. In the UK, that often means working with a mature tree you have permission to use rather than trying to treat the job like a casual foraging walk.
The species matters, but so does access. If the cones are on private land, in a garden, or on managed woodland, I check before I pick anything. That is not just courtesy; it avoids a lot of wasted effort on fruitless, immature, or inedible cones.
| Collection method | Best for | What it gives you | Main drawback |
|---|---|---|---|
| Picking closed cones from the tree | Small home harvests | The best chance of intact seeds | Needs access, timing, and sometimes a ladder or pole |
| Collecting freshly fallen closed cones | Easy ground-level gathering | No climbing | Higher risk of overripe cones and empty shells |
| Shaking or clipping cones from branches | Clusters of ripe cones | Faster harvesting | Can damage branches if done carelessly |
For a small kitchen harvest, I prefer closed cones from a tree that is already showing a good crop. Once you have the right cones, the next job is to catch them before they open and empty themselves to birds, squirrels, or the wind.
Pick cones before they open, not after
Timing is where most people lose the crop. Mature cones are usually firm, tightly closed, and not yet fully brown. In many temperate climates, the window falls somewhere between late summer and autumn, but weather and species can shift that by weeks. If the cones are already open and dry, the nuts are usually gone.
| Cone stage | What it looks like | What I would do |
|---|---|---|
| Too green | Small, hard, and fully green | Leave it alone; the seeds are not ready |
| Just right | Firm, closed scales, often with a green or purple tint | Harvest it now |
| Too old | All brown and open | Skip it; most of the seed has likely been released |
When I am unsure, I look at the whole tree, not just one cone. If squirrels are already working the crop or birds are stripping the branches, that is usually a sign the cones are mature enough to collect. Once the cones are in hand, they need warmth and airflow, which is where the drying stage starts.

Dry the cones so they open cleanly
Fresh cones should not be stuffed into a sealed bag and forgotten. For a home harvest, I use a breathable bag, a cardboard tray, or a shallow crate in a warm, dry room. Paper and mesh are your friends here; plastic is not, because it traps moisture and invites mould.
Spread the cones out in a single layer if you can. If they are very sticky, wear gloves and clothes you do not care about, because resin gets everywhere. A little airflow makes a big difference, and a sunny, dry spot often does the work without any fuss.
- Brush off loose dirt, needles, and insects.
- Lay the cones out where warm air can move around them.
- Turn them every few days so they dry evenly.
- Wait for the scales to loosen and begin to open on their own.
- If you need to speed things up, use gentle heat rather than anything harsh.
A few cones may split in a couple of days if the room is dry; others take longer. I would rather wait an extra day than scorch the crop, because once the cone opens, the real work is extracting the kernels without crushing them.
Remove the kernels and shell them without crushing them
Once the cones open, I shake or tap them over a tray so the seeds fall out with the least possible handling. A shallow bowl, a sieve, or even a clean baking tray helps keep the shells and debris under control. At this point, you are not trying to be fast; you are trying to be gentle.
The nuts still have a hard outer shell, so this is a two-step process. First, free them from the cone. Then crack the shell just enough to release the kernel inside. If you press too hard, you end up with broken pieces instead of useful nuts.
- Work over a large bowl so the small kernels do not bounce away.
- Rub off the papery wings and fragments by hand or with a coarse sieve.
- Use a light nutcracker, the flat side of a knife, or even gentle pressure with your fingers for small batches.
- Sort out empty shells as you go; they are common and normal.
If I have a tiny harvest, I shell only what I need for that day and keep the rest whole. That keeps the flavour fresher and saves time, which matters when the yield is small. The biggest losses usually come from avoidable mistakes, not from the shelling itself.
Avoid the mistakes that waste most of the crop
The biggest beginner mistake is picking the wrong cone stage. Too early, and the seeds are immature. Too late, and the cone has already opened and scattered its contents. The second big mistake is poor storage: a damp sack, a sealed plastic bag, or a warm windowsill can undo hours of collecting.
I also see people overheat the cones because they want quick results. That is unnecessary for a kitchen-scale harvest. Gentle warmth is enough. Strong heat may make the cones open faster, but it also makes the kernels more brittle and can flatten the flavour.
- Do not harvest fully open brown cones unless you are only collecting decorative material.
- Do not store cones in plastic if they are still drying.
- Do not leave the crop where rain, dew, or condensation can reach it.
- Do not assume all pine species will give you large, worthwhile kernels.
- Do not wait too long to process the cones once they have opened.
There is a simple rule I keep in mind: if the cone smells of resin and feels dry enough to open, it should move quickly from storage to extraction. Once you avoid those losses, the remaining question is how to keep the nuts fresh long enough to cook with them.
Turn a small harvest into something worth keeping
Pine kernels are oily, which is exactly why they taste so rich and also why they spoil faster than many other pantry ingredients. For shelled kernels, I keep them in an airtight container in the fridge if I plan to use them soon. If I want to hold them longer, the freezer is the safer choice. A cold store is not overkill here; it is the difference between sweet, buttery flavour and stale oil.
For a practical rule of thumb, refrigerated kernels are best used within a few weeks, while freezing buys you much longer storage. That makes sense if you only harvested a small handful. It also makes them easy to treat like a finishing ingredient rather than a bulk staple.
In a Basque-inspired kitchen, I like them lightly toasted and used sparingly, because a small amount goes a long way. They work well over braised greens, with fish, folded into savoury pastry fillings, or scattered over a simple tomato dish where the nutty sweetness can stand out. If you have only a modest harvest, that is enough to make several dishes feel more deliberate and more seasonal.
That is the real reward of the whole process: not a huge haul, but a small, carefully handled ingredient that tastes like the effort it took to gather it. Treat the cones gently, dry them well, and use the kernels while they are still fresh.
