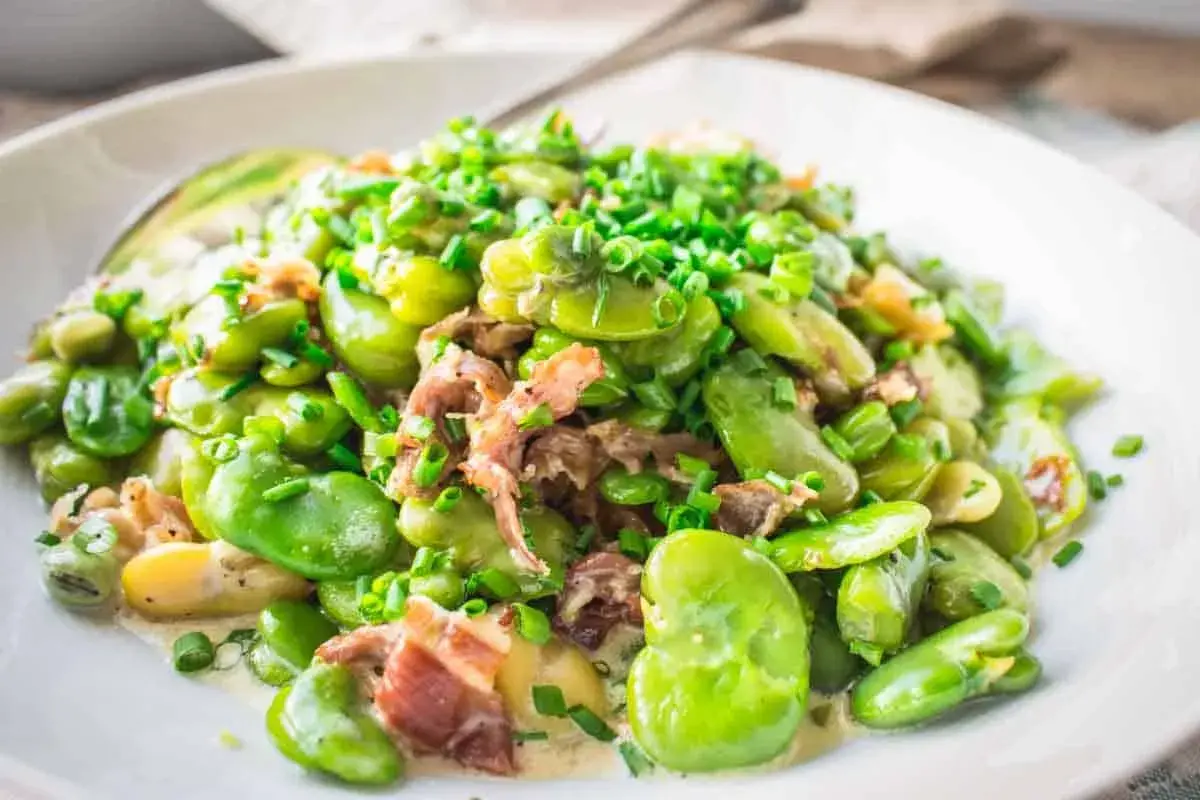
Broad beans are one of those vegetables that reward a little attention. This guide covers how to cook fava beans in a way that keeps the flavour bright, the texture tender, and the process manageable at home. I’ll walk through what to buy, how to prep fresh pods, which cooking methods work best, and how I like to finish them with olive oil, herbs, and a few Basque-leaning touches.
The shortest route to tender, sweet broad beans
- Fresh beans need shelling, a quick blanch, and sometimes a second peel if the skins are tough.
- Frozen beans are the easiest option for weeknights, because they usually need only a few minutes of cooking.
- Dried beans need soaking and a longer simmer, but they give the deepest, most rustic flavour.
- Lemon, olive oil, garlic, mint, and parsley are the most reliable finishes when you want the beans to taste clean and green.
- Young beans can stay slightly firmer, while older beans usually need peeling to avoid a chalky bite.
- Stop early rather than late, because overcooked broad beans quickly turn dull and mealy.
Which beans I would buy for the dish you have in mind
In the UK, broad beans are the name you’ll usually see on the shelf, even though fava beans is the broader international term. I choose between fresh, frozen, and dried beans based on the final dish, not just what looks good in the market. If I want a bright spring side, I go fresh. If I want speed, I reach for frozen. If I want a thicker, more old-world stew or purée, dried beans earn their place.
| Form | What to look for | Prep needed | Best for | My take |
|---|---|---|---|---|
| Fresh in pods | Firm, glossy pods that feel full but not dry or floppy | Shell, blanch, then peel larger beans if needed | Salads, tapas, side dishes, spring plates | Best flavour, but it asks for the most hands-on work |
| Frozen shelled beans | Bright colour, no freezer burn, no large ice crystals | Usually cook from frozen in a few minutes | Weeknight sides, pasta, soups, quick sautés | The smartest shortcut when you want broad beans without the shelling |
| Dried beans | Even colour, intact skins, no dusty or cracked beans | Soak overnight, then simmer until tender | Stews, purées, rustic bean dishes | Least convenient, but the flavour is deeper and more substantial |
If I am buying fresh beans, I look for the shortest route from pod to plate. If I am buying frozen beans, I look for convenience without losing the bean’s sweetness. Once you know which form you have, the preparation step becomes much easier.
How I prepare fresh beans before they hit the pan
This is the part that makes the biggest difference. A lot of people stop at shelling, but with broad beans, a quick blanch and, when needed, a second peel are what take them from merely acceptable to genuinely good. The second peel is often called double-podding, which simply means removing the thin skin around each bean after blanching.
- Split the pod along the seam and push the beans out with your thumb.
- Bring a pan of salted water to a boil and drop in the shelled beans.
- Blanch young beans for about 2 to 3 minutes. Larger beans may need another minute or two.
- Drain immediately and cool them under cold running water, or in ice water if you want to stop the cooking fast.
- Pinch each bean to slip off the tougher outer skin if it feels leathery or looks dull.
- Pat the beans dry before sautéing, roasting, or folding them into another dish.
Very young beans can be left with their skins on if they are small and tender, but I still peel bigger ones. That extra step is not just cosmetic, because it changes the texture from dusty to silky. After that, the real decision is how you want to cook them, because the method changes the texture more than the seasoning does.
The cooking methods that give the best texture
There is no single correct method, but there are better and worse matches for each type of bean. I keep the approach simple: gentle heat for freshness, a little more time for depth, and enough seasoning to support the bean instead of hiding it.
| Method | Time | Texture | Best use |
|---|---|---|---|
| Boiling or blanching | 2 to 3 minutes for young beans, a little longer for larger ones | Bright, tender, clean | Salads, quick sides, topping for toast |
| Steaming | About 4 to 6 minutes, depending on size | Gentler and slightly more delicate | When you want to avoid waterlogging |
| Sautéing after blanching | 1 to 2 minutes in the pan | Silky with a light savoury edge | Tapas, warm salads, quick plates with garlic and herbs |
| Roasting in the pod | About 10 to 15 minutes in a hot oven | Sweet, slightly smoky, a bit more rustic | Very fresh pods when you want an easy snack or starter |
| Simmering dried beans | Soak overnight, then simmer roughly 40 to 60 minutes | Creamy and substantial | Stews, purées, and slow-cooked dishes |
If I had to pick one rule, it would be this: cook broad beans until they are tender but still bright. The moment they go grey or mealy, you have already gone too far. With texture sorted, seasoning is what makes the dish feel intentional rather than generic.
The seasonings I reach for on a Basque table
When I want broad beans to fit naturally into a Basque-style meal, I keep the finish restrained and seasonal. The best dishes in this lane do not bury the vegetable. They frame it. That usually means good olive oil, garlic, spring onion, parsley, mint, and a little salt. Lemon works too, but I add it at the end, not the beginning, so the beans stay sweet.
- Olive oil and lemon give the cleanest result when the beans are young and fresh.
- Garlic and spring onion add depth without turning the dish heavy.
- Mint or parsley keeps the flavour green, which matters more than most people think.
- Jamón or chorizo works when you want a richer tapa-style plate, but I use it sparingly so the bean still leads.
- Eggs, grilled fish, or rustic bread turn the beans into a real meal instead of a side note.
I like this balance because it respects the produce. That is the same discipline I want in a good Basque kitchen: the ingredient should taste like itself first, and the extras should make that clearer, not noisier. Even so, a few common errors can still flatten the result, so I watch for them before serving.
The mistakes that make broad beans disappointing
Most bad broad beans are not ruined by a lack of flavour. They are ruined by timing. The bean is naturally sweet and soft, but it punishes overconfidence quickly.
- Cooking them too long strips out the green flavour and leaves a dull, floury texture.
- Skipping the second peel on large beans leaves you with skins that taste papery instead of tender.
- Adding lemon or vinegar too early can make dried beans feel stubborn before they have had time to soften.
- Using old beans without adjustment often means you need longer cooking and a little more patience.
- Overloading them with heavy sauce hides the flavour you actually came for.
If a bean tastes flat, I usually blame one of two things: it was too old, or it was cooked until its colour and structure disappeared. Once those traps are out of the way, the quickest way to make the beans shine is a simple finish.
My 10-minute finish for a side dish or tapa
This is the version I make when the beans are young and I want them on the table fast. It is simple, but it still feels complete because the beans stay in charge.
- Blanch 400 g of podded broad beans for 2 to 3 minutes, then drain and cool them.
- Peel the larger beans if the skins feel tough.
- Warm 2 tbsp olive oil in a pan and add 1 small garlic clove, thinly sliced.
- Add the beans with a pinch of sea salt and black pepper, then toss for 1 to 2 minutes.
- Finish with lemon zest, a small squeeze of juice, and chopped mint or parsley.
- Serve with toast, a fried egg, grilled fish, or a few slices of cured ham if you want a fuller tapa.
For a richer plate, I sometimes add a little chorizo fat or a few salty flakes of cheese, but only when the beans are young enough to stay sweet. Leftovers are even better cold the next day in a salad or folded into eggs, which is usually when I remember why broad beans are worth the effort in the first place.
