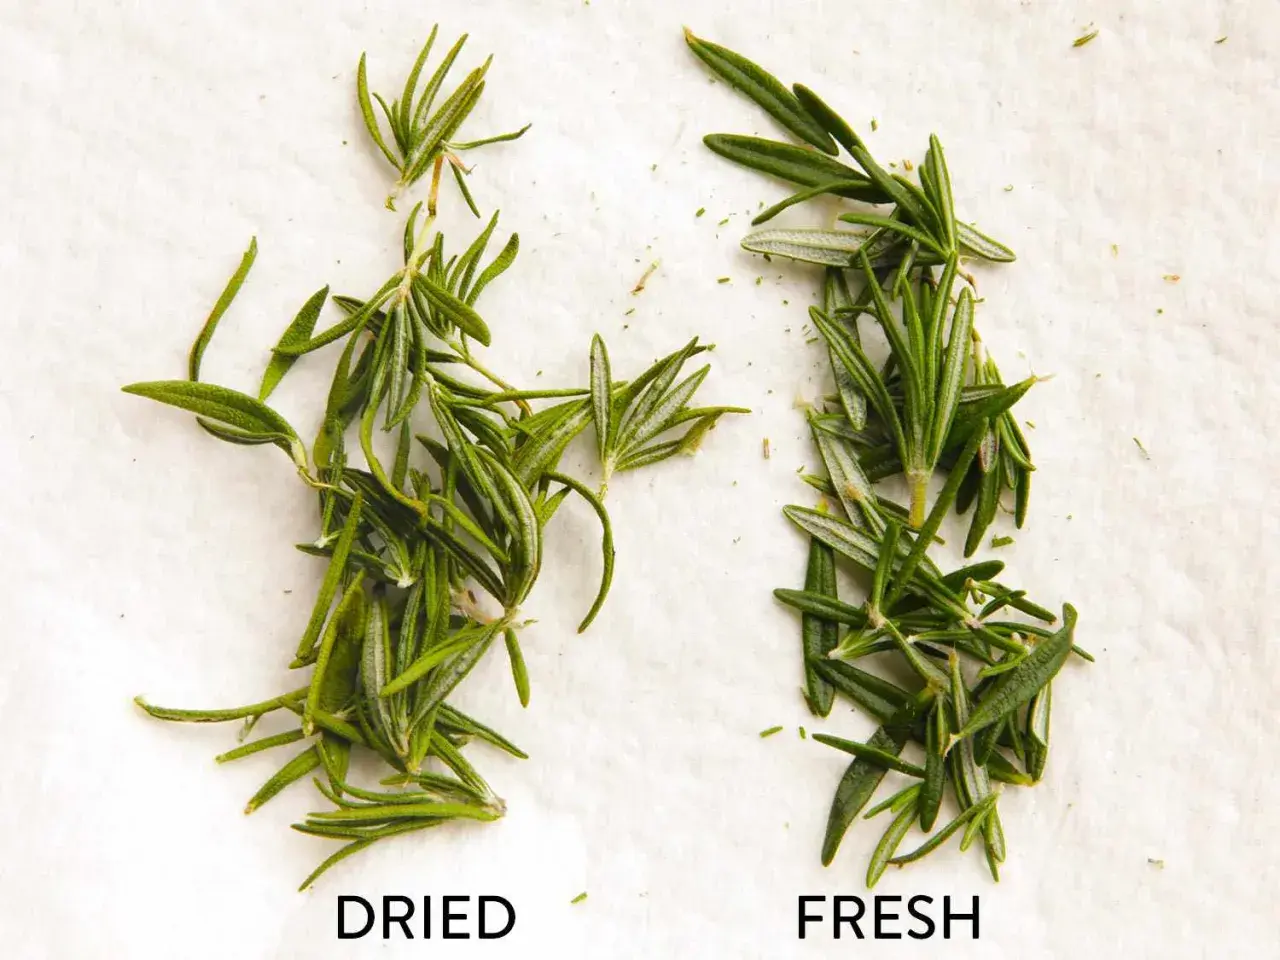
Knowing how to dry herbs properly matters because the wrong method can strip aroma faster than it removes moisture. I focus here on the practical decisions that make the biggest difference: when to harvest, which drying method suits each herb, how to avoid mould or browning, and how to store the finished leaves so they still taste like something. For a kitchen that cooks seasonally, this is one of the simplest ways to turn a short harvest into months of useful flavour.
The quickest route to flavourful dried herbs
- Harvest at the right moment: pick herbs in the morning after the dew has gone, ideally before they flower.
- Choose the method by herb and climate: air drying suits sturdy stems, while a dehydrator is more reliable in a damp UK kitchen.
- Dry gently, not aggressively: low heat protects colour and essential oils better than a hot oven.
- Store them whole: airtight jars, kept cool and dark, hold flavour far better than open spice racks.
- Expect a flavour window: most dried herbs are at their best within about 6 to 12 months.
Choose the method that fits the herb and the weather
The method I choose first depends on two things: the herb itself and how much moisture is in the room. In a dry, airy space, sturdy herbs can dry beautifully on their own. In a British kitchen with steam, drizzle, and radiators working overtime, a dehydrator usually gives more predictable results.
| Method | Best for | Typical time | Why I use it | Main limitation |
|---|---|---|---|---|
| Air drying | Rosemary, thyme, oregano, sage, bay | About 1 to 3 weeks | Cheap, simple, and gentle on flavour | Needs warm, dry air and patience |
| Dehydrator | Most herbs, including basil, mint, parsley, and chives | About 1 to 4 hours | Most reliable when humidity is high | Requires equipment |
| Oven | Small batches when you need speed | About 1 to 3 hours | Useful if you do not own a dehydrator | Easy to overheat and dull the flavour |
| Microwave | Tiny emergency batches | Minutes, not hours | Fastest option for a few sprigs | Uneven and easiest to damage |
My rule is simple: if the herb has sturdy stems and you are not in a rush, air drying is fine. If the leaves are delicate, or the room feels damp, I would rather use controlled heat than gamble on a mouldy bundle.
Prepare the herbs before they ever touch the drying rack
Good drying starts before the heat or airflow begins. I harvest herbs after the morning dew has lifted, because extra surface moisture slows everything down and increases the risk of spoilage. For the best flavour, I also cut them before full flowering, when the plant has put more energy into its leaves than into seeds or blooms.
Once picked, I sort through them quickly:
- Remove any bruised, yellowing, or insect-damaged leaves.
- Rinse only if the herbs are dusty or visibly dirty, then dry them very thoroughly.
- Pat larger leaves with a clean tea towel or paper towel.
- Keep sprigs as intact as possible; whole stems dry more evenly than chopped herbs.
If you are working with supermarket herbs, the same rules still apply. The difference is that you may need to be gentler when handling soft stems, because they often wilt faster once the packaging is opened. That becomes important in the next step, where airflow does most of the work.
Air dry sturdy herbs in small, loose bundles
Air drying is the old method for a reason: it works, provided the conditions are right. I use it for rosemary, thyme, oregano, sage, bay, and other herbs with firm stems or relatively low moisture content. In those cases, a warm room with good air movement is more important than any gadget.
- Gather 5 to 10 stems into a small bundle.
- Bind them loosely with string, twine, or a rubber band that can tighten as the stems shrink.
- Hang the bundles upside down in a dark, well-ventilated place.
- Keep them away from direct sun, which can bleach the leaves and flatten the flavour.
- Check them every few days and remove any sprigs that look soft or discoloured.
For delicate leaves that tend to fall off, I often use a paper bag with a few holes punched in it. The bag catches the leaves, keeps dust off, and slows the fall-out you get from parsley or mint. The key is still the same: air should move around the herb, not blast straight into it.
In a cool, wet house, hanging bundles can take much longer than expected. That is when a dehydrator stops being a luxury and starts being the more sensible choice.
Use a dehydrator, oven, or microwave when you need speed
When I want a more controlled result, I move to heat-assisted drying. The aim is not to cook the herb, only to remove moisture quickly enough that the leaves do not brown or ferment. Lower temperatures are better, because the volatile oils that carry flavour are fragile.
For a dehydrator, I spread the herbs in a single layer on the trays and run them at roughly 35 to 46°C. If the air is especially humid, a slightly higher setting can help, but I still keep the heat low. Most herbs are ready in 1 to 4 hours, depending on leaf thickness and room humidity.
If I use an oven, I set it to the lowest possible temperature, usually around 50°C if the appliance allows it. I keep a close eye on the trays, because oven heat can become uneven very quickly. This method is fine for a small batch, but it is not the one I would choose for preserving a whole basket of basil after a garden cut-back.
The microwave is the emergency option. It can handle a very small quantity in a minute or two, but it is easy to overdo. I only use it for tiny batches of parsley, thyme, or similar herbs when I need them immediately. For anything larger, I would rather wait a little longer and keep the flavour intact.
Know when the herbs are done and store them for flavour
Herbs are ready when they feel brittle, not leathery. The leaves should crumble easily between your fingers, and thicker stems should snap rather than bend. If a stem still feels flexible, it needs more time; packing it away too early is how people end up with mould hidden in the jar.
Once they are dry, I strip the leaves from the stems and store them whole whenever possible. Whole leaves keep their aroma better than pre-crushed herbs, and I only crumble them just before cooking. For storage, I use:
- Small airtight glass jars or tins.
- A cool, dark cupboard away from the hob, kettle, and direct light.
- Labels with the herb name and the drying date.
- Separate jars for stronger herbs, so one scent does not dominate everything else.
As a working guideline, most dried herbs are at their best for about 6 to 12 months. Hardy herbs such as rosemary, thyme, sage, oregano, and bay usually hold their flavour longer than delicate leaves like parsley, chives, dill, and coriander leaf. I always test by smell first: if the herb smells dusty or faint, I use more of it or replace it.
One practical rule that helps in cooking is to start with about one-third of the fresh amount, then adjust. Dried herbs are more concentrated, so a heavy hand can make a dish taste dull or woody instead of balanced. That matters even more in simple dishes, where there is nowhere for bad seasoning to hide.
Avoid the mistakes that strip colour, aroma, and shelf life
Most problems with dried herbs come from trying to rush them. I see the same mistakes again and again, and they are all avoidable:
- Overcrowding the herbs: if the leaves overlap too tightly, air cannot reach the centre and moisture lingers.
- Using too much heat: high heat can roast the herbs instead of drying them, leaving them brown and flat.
- Drying in direct sun: sunlight bleaches colour and can make the herbs taste tired before they are even stored.
- Storing before they are fully dry: this is the fastest route to mould, especially in a sealed jar.
- Leaving jars beside steam or light: the shelf above the cooker is a bad place for anything you want to keep fragrant.
There is also a less obvious mistake: drying every herb the same way. Rosemary and thyme forgive a lot. Basil and parsley do not. Once you accept that difference, the process gets much easier and the results improve quickly.
Know which herbs dry well and which ones I usually freeze
Some herbs are natural candidates for drying because they hold onto flavour well once the moisture is gone. Others lose their brightness and become a little dusty or papery. I treat them differently rather than forcing every bunch into the same jar.
| Herb | Drying verdict | Why |
|---|---|---|
| Thyme | Excellent | Small leaves and a strong aroma make it ideal for drying |
| Rosemary | Excellent | Sturdy needles dry reliably and hold their flavour well |
| Oregano | Very good | Classic drying herb for sauces, grills, and stews |
| Sage | Very good | Leaves dry neatly and stay useful in cooked dishes |
| Bay | Good | Slow-drying leaves are worth keeping for soups and braises |
| Parsley | Mixed | Can dry, but often loses more freshness than I want |
| Chives | Mixed | Fine for drying, but the flavour can fade quickly |
| Basil | Better handled carefully | It dries, but freezing often keeps the greener flavour better |
| Dill and coriander leaf | Often better frozen | They lose a lot of their brightness once dried |
If I am building a pantry for everyday cooking, I dry the herbs that still taste useful after months on the shelf, and I freeze the ones that are too delicate to survive the process well. That gives me better flavour in the long run and less disappointment when I open a jar.
Build a small herb pantry that fits Basque cooking
In a Basque-style kitchen, I want herbs that support the dish rather than compete with it. Dried thyme, oregano, bay, and rosemary are the jars I reach for most often because they sit comfortably beside beans, grilled fish, roast vegetables, tomato-rich sauces, and slow-cooked dishes. They are not loud, but they add a steady backbone that makes a simple plate feel finished.
My favourite practical habit is to keep only a small number of jars on hand and refill them often. Freshly dried herbs smell brighter, crumble more cleanly, and deliver better flavour than a forgotten container that has spent a year above the cooker. I also like to keep one jar of a single herb and one small mixed jar for quick weeknight cooking, as long as the blend is simple and balanced.
If you want the shortest possible version of the process, I would reduce it to this: harvest at the right moment, dry gently, test for brittleness, and store the herbs whole in a dark, airtight jar. Do that consistently, and your dried herbs will stay useful instead of becoming another forgotten pantry item.
